Pages

Search This Blog

12 February 2010

Kids Sled...part one - bentwood


The week before our daughter Helen was born I started working on a kids sled.
I got as far roughing out two runners and braces. Recently I was able to get some more work done on the project.

I am experimenting with bending wood. I will use bentwood for the sides of the sled.

After researching bentwood in a reference book I have (Canadian Woods- their properties and uses pg 93 - published 1951 by Forestry Branch(Canadian Government)) I found that hardwoods are recommended over softwoods for bending.

As a rule of thumb, the book suggests a ratio of 1/40 for the thickness-to-bend radius ratio.
I selected a 6.25" radius for the side pieces. For the purposes of this calculation lets use 6" for an example 6/40 = 0.15 " My individual strips are approx. about 3/32" or .09" This should work.

I did not actually measure the strips.Instead I, put my stock on the table saw(not running)
between the blade and the fence. I brought the fence up to the stock. Engaged the fence lock, removed the stock. Then I moved the fence 3/16" closer to the blade, engaged the fence lock again and cut my strip of wood. A zero clearance plate is highly recommended for the procedure.
I use a Freud rip blade.
The ultimate test of how thick or thin your strips are is to dry bend them over your radius template. If you can hold all strips over the intended curve without breaking them you are good to go. I used maple and walnut in alternating positions to make my test piece. Yellow glue(Elmers Pro Bond) glued the pieces together. The test piece turned out very well. I was impressed with the results.

Stay tuned for the completion of this sled:)


21 November 2009

Bathroom vanity

This bathroom vanity was two years in the making- mostly because I just did not get it done earlier:)

The side panels are Spruce and Cedar. The door frames are Teak with Brazilian chestnut and Maple dividers. Rail and stile construction was used for the doors and frame of the vanity.

The handles are Mahogany with Walnut inlays.
The board above the doors is also Walnut.

I wanted to finish this project before our baby was due. My wife very patiently helped me with this project. The counter top is black granite.


10 October 2009

Zebra


This Zebra is based on the pattern I used for the horse. My inspiration for using two types of wood was from a friend of mine who turns wood pens using multi wood blanks to start with.


Two species of wood were needed for the different colours. I used walnut and maple. After the blank was glued up, I smoothed the edges with a smoothing plane. A small scraping plane was used to take out the tiny marks left in the wood. The final effect of the planes was a finish

that was absolutely flat.


When two different types of wood are used there will be differences in how the wood is sanded. The walnut is softer than the maple. I finished this project with Tung Oil and I was impressed with the way the colours of the wood came out.

19 August 2009

Hand tools


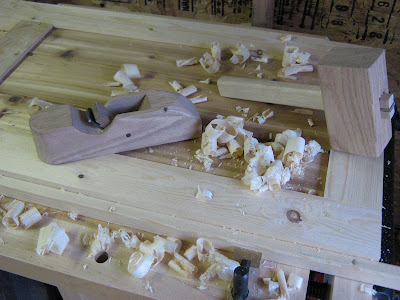
My collection of hand tools is slowly growing with the addition of a wood mallet and smoothing plane. The plane was made by myself at a Lee Valley workshop. I highly recommend this class at the Calgary Lee Valley. The plane was made in one day from a few pre-fabricated pieces of red oak. The blade and chipper are supplied as well. This wood smoothing plane works well when it's
tuned up correctly.

The wood mallet is made from red oak too. I built this in one evening in my shop. There are a few small things left to do- like shape the handle some more.

There is something really fascinating about using tools that you have made yourself. A real feeling of accomplishment.